You notice one corner sank, one tile chipped, or one joint opened, and now the whole garden paving looks “unfinished” in photos. A full redo feels crazy when the damage is the size of a dinner plate.
In Malaysia, heavy rain, humid air, and fast algae film make small flaws stand out on terrace-house walkways and condo patios. Water also sneaks under edges, so tiny gaps can spread quietly.
In this guide, you’ll learn how to patch small paving areas without restarting everything so the surface stays safe, tidy, and consistent with your original layout. You will also learn how to stop the same spot failing again.
Hi, I’m Ken. I write practical home guides for Malaysia—no fluff, just what works.
I hold a formal building design qualification and have spent about 20 years on job sites across hundreds of projects. My goal is simple: help you avoid costly mistakes with clear, safe steps—a quick way to decide what to do next.
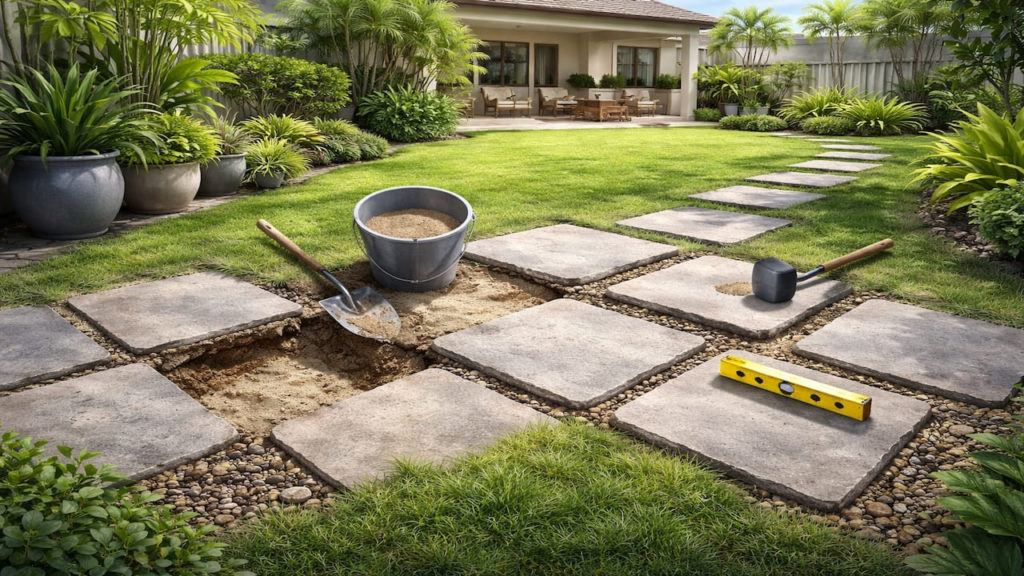
1. Patch garden paving without redo: 5 steps
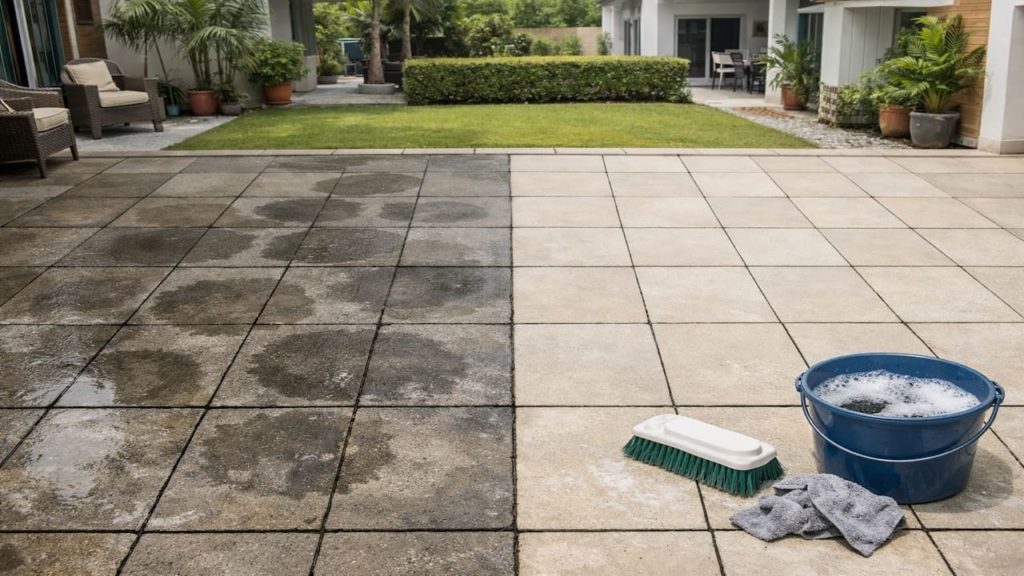
Patch work succeeds when you fix the base not the face so the repaired area stays level after the next wet month.
A chip or wobble is usually a base or drainage story, not “bad pavers” by itself. In humid Malaysia, water sits longer, softens bedding sand, and grows slick film that hides early movement. Spot repairs. If you treat the cause, the patch blends and lasts.
- Mark the loose area with masking tape
- Lift pavers gently and keep the pattern order
- Scrape out soft sand and wet debris
- Dry the base before adding new bedding
- Re-seat pavers and re-pack joints firmly
Some people say “just fill the gap and go,” but that is how the same dip returns next rain — and then you pay twice in time. A clean lift and re-seat takes longer once, yet saves repeated weekend fixes. The goal is stability, not speed. Quiet surface.
2. Repair small areas without breaking the plan
Keep your original module and lines unchanged so the patch looks like part of the design, not a random scar.
Most paving looks “planned” because joints line up and borders stay straight across the yard. If your patch changes joint width, paver direction, or edge finish, your eye catches it every day. Visual rhythm. Malaysia glare after rain makes misaligned joints even louder.
- Match paver size and thickness exactly
- Reuse the same laying direction and bond
- Keep joint width consistent across old and new
- Continue border lines through the patched zone
- Blend surface texture to avoid shiny mismatch
You might think nobody will notice, but you will notice first, especially in narrow terrace spaces where the paving is always in view — so protect the layout rules. If you cannot match materials, move the patch to a “natural break” like a corner. Controlled compromise. Same plan.
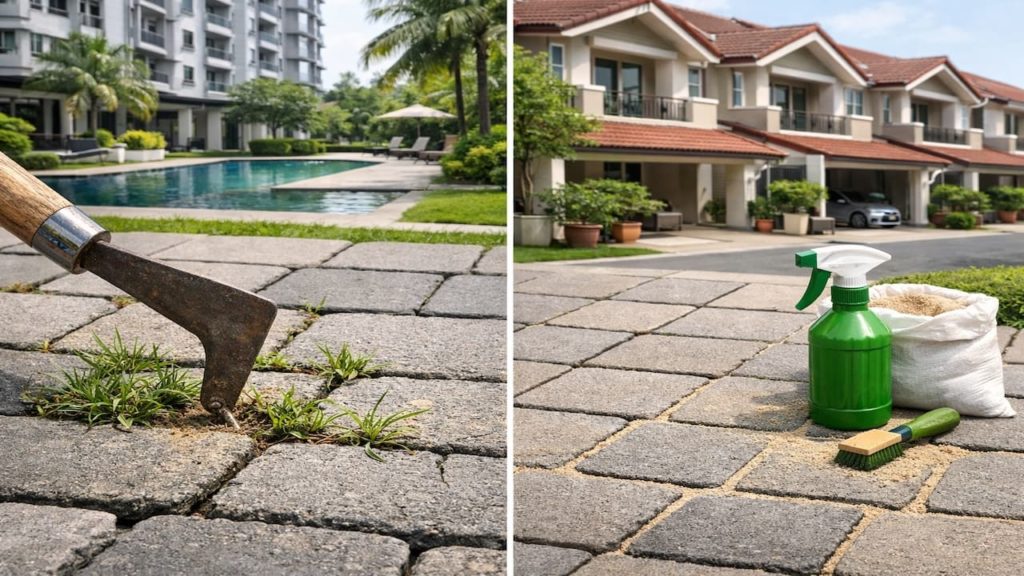
3. Why small patches fail in wet months
Most patches fail because moisture keeps moving under them and the repaired spot never gets a stable, dry base.
In Malaysia, short storms can dump water fast, then heat bakes the top while the lower layer stays damp. That trapped moisture softens sand, invites algae slime, and lets ants and roots disturb joints. Hidden movement. A patch that ignores water flow will loosen again.
- Water pools at low points beside walls
- Clogged drains push runoff under paving edges
- Loose edging lets the field spread outward
- Wet bedding sand compacts unevenly after storms
- Mixed batches create height mismatch and rocking
People blame “cheap pavers,” but even premium pieces rock if the base is wet and uneven — structure always wins. Fix water paths and confinement first, then the pavers behave. If you skip that, the same corner becomes your monthly headache. Repeat failure.
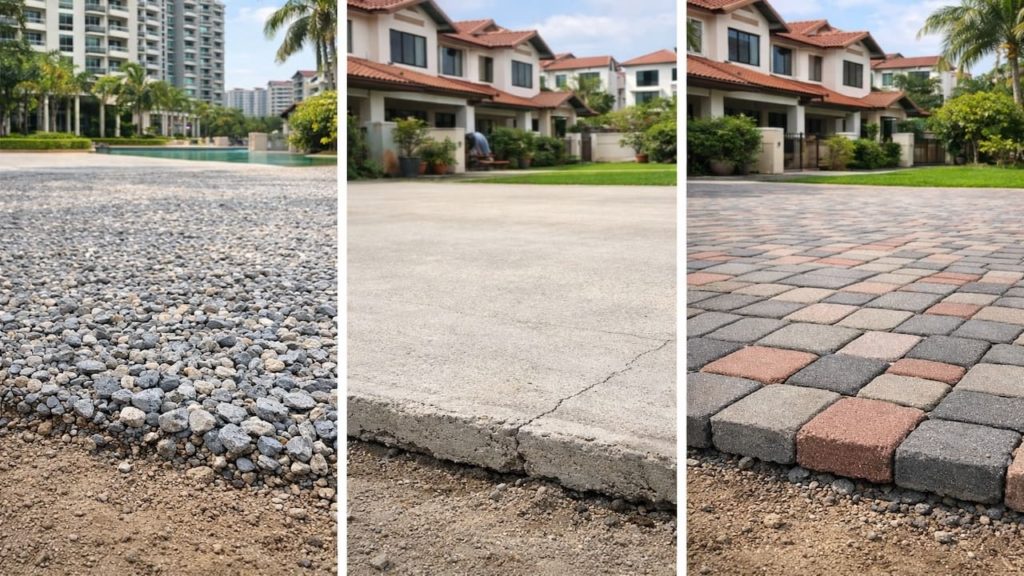
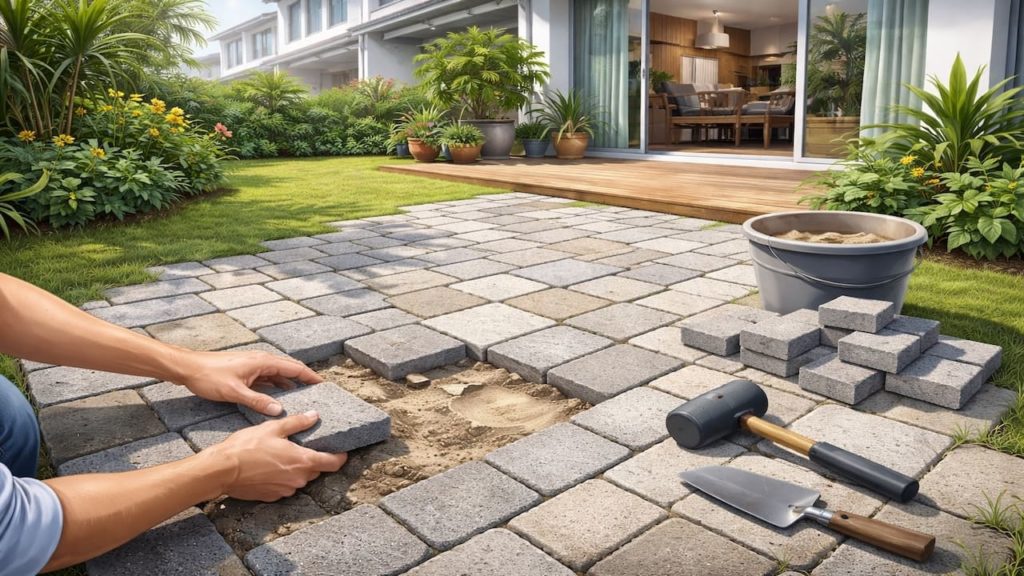
4. How to patch like a pro in one afternoon
Work in a tight square and rebuild layers in order so the repair locks in and disappears visually.
Plan the patch boundary, lift only what you must, and rebuild from sub-base to bedding to joints, then test with water and foot pressure. RM30–120 covers basic sand, jointing material, and small tools. Small spend. Choose a dry window, because humidity slows drying and rushed wet layers fail.
- Cut a clean patch boundary along joint lines
- Lift pavers and stack them in order
- Level sub-base and compact it firmly
- Add bedding layer and screed to height
- Reinstall pavers and lock joints with sand
Some say “one afternoon is too short,” but it works if you keep the area small and follow the layer order — shortcuts are what cost you days later. If the base is still wet, stop and let it dry, even if it feels annoying. Long life. Clean finish.
5. FAQs
Q1. Can I patch only one loose paver?
Yes, if the neighbors are stable and the base below is dry. Lift the single piece, refresh the bedding, and re-pack joints tightly so it cannot rock.
Q2. How do I match old pavers that are sun-faded?
Start by reusing your original pieces if you have spares. If you must buy new, place them in a less visible corner and keep the joint lines consistent.
Q3. What if algae makes the patched area look different?
Texture and water flow matter more than color in wet months. Reduce standing water first, then the new patch will “age in” and look closer over time.
Q4. Should I use mortar for outdoor garden paving patches?
Use mortar only where the original build used it, or where edging needs rigid support — keep the system consistent or cracks will appear between methods. For most sand-set pavers, rebuild the sand layers instead.
Q5. How do I know the patch is stable before I stop?
Press on corners, walk across it, and listen for crunching. Then splash water and watch where it runs, because puddles predict future looseness.
Pro’s Tough Talk
Listen, 現場で20年以上 and 何百件もいろんな工事をやった, and the “tiny patch” that gets ignored turns into a full redo later. Malaysia rain doesn’t negotiate, it just moves your base.
Cause is 3 things. One, you patched the top and left the wet mush under it. Two, water still pools and keeps feeding the spot. Three, the edge is loose so everything slowly spreads.
Do 3 steps now. Mark the bad zone, lift until you hit solid base, then rebuild layers in order and lock the joints hard. Test with water and your full body weight.
This patch is not makeup, it is a bandage on a broken bone, and if you rush it you get the same wobble again Fix the base before you touch the surface. That is the whole game.
The “guests are coming” hose-down freeze, and the “laundry in both arms” near-slip, yeah those moments happen, so here’s the tsukkomi: come on, really. Keep gambling on that loose corner, and one day you’ll redo the whole yard and call it “planned.”
Summary
Small paving damage can be patched cleanly when you treat it as a base and water problem, not a surface problem. Keep your original lines and joint widths.
If the same spot fails twice, stop patching the symptom and audit drainage, edging, and low points around walls. One decision point. No denial.
Patch small and rebuild layers in order then move to your next related guide like drainage checks or algae slick prevention.