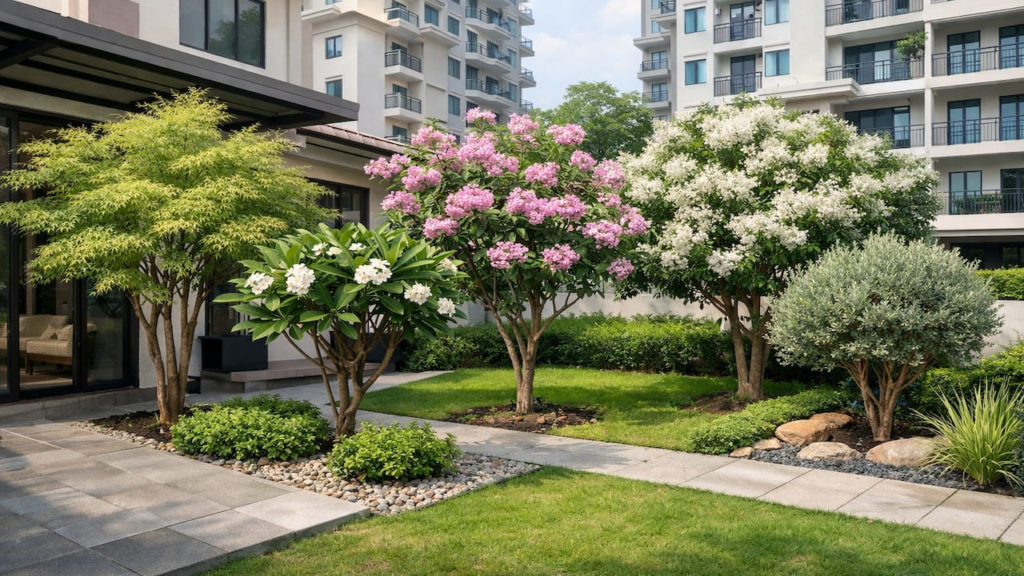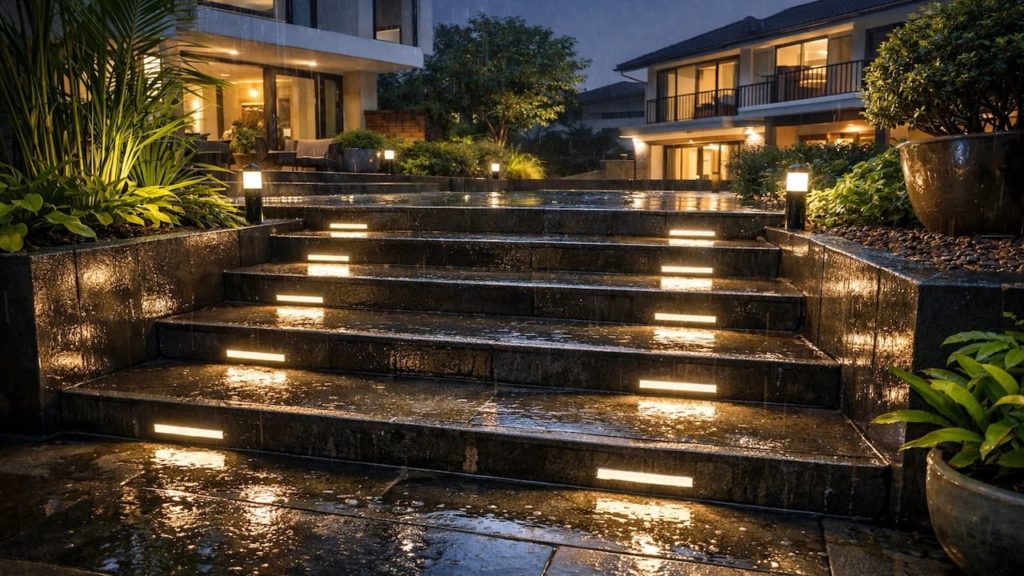
You walk outside on a wet night and the steps feel risky because the edges disappear and glare bounces off damp tiles. In Malaysia, rainy evenings and humidity can turn small stairs into a slip zone fast.
Water sheen on surfaces reflects light, plants cast moving shadows, and one strong light can create deep dark patches. If step lights are spaced wrong or aimed at eye level, you get glare but still cannot see the edge.
In this guide, you’ll learn how to set step lights for wet nights with clear edges and spacing that keeps stairs safer. You will also learn quick checks, simple upgrades, and maintenance habits that work in humid weather.
Hi, I’m Ken. I write practical home guides for Malaysia—no fluff, just what works.
I hold a formal building design qualification and have spent about 20 years on job sites across hundreds of projects. My goal is simple: help you avoid costly mistakes with clear, safe steps—a quick way to decide what to do next.
1. Garden step lights for wet nights: 5 checks
Safe steps need even low light not bright beams.
In Malaysia, wet tiles behave like mirrors, so glare can hide the step edge instead of revealing it—visibility. Step lighting. Start by checking where your eyes look when you descend, where reflections appear, and which step is the hardest to read. The goal is consistent light on each tread and riser edge.
- Walk stairs at night and mark invisible edge zones
- Check wet-surface glare when facing the light source
- Look for deep shadows under nosing and side walls
- Confirm fixtures are shielded from direct eye view
- Test spacing so each step gets its own light cue
Some people add a brighter light to fix darkness, but brightness without control often makes wet-night glare worse. Reality. Control glare and spacing first.
2. Safer stairs with clear edges and spacing
Place lights to reveal the step lip from the side, not straight on.
Clear edges happen when light grazes across the tread surface and makes the lip visible by contrast. In Malaysia humid nights, that contrast must be gentle because harsh contrast creates “black bands” and confusion. Use side placement, low mounting height, and even spacing so each step reads the same way. Consistency is safety.
- Install lights low on side walls aiming across treads
- Use two small lights for wider stair runs
- Keep equal spacing to prevent dark surprise steps
- Shield fixtures to stop direct glare into eyes
- Add subtle wall wash to soften harsh shadow lines
You might think lighting the top step is enough, but the middle steps are where slips happen because the pattern breaks. Truth. Light the entire run evenly.
3. Why stairs feel more dangerous on wet nights in Malaysia
Reflections hide edges and moving shadows distract your eyes.
Water film on tiles reflects point sources, so a small bright light creates a hotspot that makes your eyes adjust and the edge looks flatter. Malaysia breezes move leaves, so shadows flicker across steps if lights aim at plants. Tight stair corners also trap damp and grime, which darkens edges over time. The result is poor depth perception when you need it most.
- Notice hotspots on wet tiles near step edges
- Spot flickering leaf shadows crossing the stair run
- Check algae film making treads look uniformly dark
- Find visible bulbs creating glare at eye height
- See uneven light leaving one step significantly darker
It is easy to blame rain, but the real cause is uncontrolled point light plus reflective surfaces plus uneven spacing. Mechanism. Spread and shield and the steps become readable again.
4. How to upgrade step lighting without major rewiring
Use low-voltage or solar points and place them for consistent edge visibility.
Start by improving the first and last steps, then fill the middle steps so the pattern is continuous. Choose fixtures designed for outdoor splash and install them where they are easy to clean, because humidity film reduces brightness and creates uneven output. For basic supplies like step lights, clips, and mounting hardware, RM20–250 is common depending on how many points you add. Keep it simple and serviceable.
- Add one light per 2 to 3 steps for guidance
- Mount lights on sides to avoid straight-on glare
- Use motion sensor at entry for safer first step
- Seal cable routes and keep joints above splash zones
- Clean lenses monthly to maintain even light spread
Some people chase fancy smart controls, but placement and spacing still decide safety more than apps do. Priority. Build a consistent light pattern first.
5. FAQs
Q1. How far apart should step lights be for safety?
Keep spacing consistent so each step run looks predictable. Many setups work well when lights provide a cue every few steps, but avoid leaving one step much darker than the rest.
Q2. What is the biggest cause of glare on wet stairs?
Visible point light sources aimed at eye level create hotspots on wet tiles. Use shielded fixtures and aim light across the treads instead of outward.
Q3. Can solar step lights work in rainy months?
They can, but output may drop if panels are shaded or cloudy days reduce charging. Use them as part of a layered setup and keep panels clean for better reliability.
Q4. Should I light the riser or the tread?
Lighting that grazes the tread helps reveal texture and the step lip, which improves footing confidence. A small amount of riser light can also help define the step edge.
Q5. How do I keep step lights from looking harsh?
Use warm tones, lower intensity, and more fixtures rather than fewer brighter ones. Add a gentle wall wash to reduce deep shadows and make the stair run feel calm.
Pro’s Tough Talk
Alright, I’ve been on site 20+ years, done hundreds of jobs, and wet-night stair slips are not random. Malaysia rain turns tiles into mirrors, and bad lighting turns mirrors into confusion.
Three causes. One, lights are too bright and too exposed, so glare blinds you while the step edge disappears. Two, spacing is uneven, so one step is dark and your foot guesses. Three, lights aim at plants and walls, so flickering shadows dance across the tread like a cheap horror scene.
Do this in 3 steps. First, hide the light source and aim low across the step, not into faces. Second, make spacing consistent so every step reads the same way. Third, keep lenses clean and control algae film on treads so the edge contrast stays clear.
Don’t blame yourself, and don’t blame every contractor either, but the structure is cold. People buy “bright” because it looks impressive, then regret it on wet nights. Even low light beats harsh bright glare and that is the truth.
Classic: the stairs look bright, but the edge line vanishes and you do the slow careful shuffle. Classic: you add one light, then the shadow band moves and the middle step becomes the trap step. Oi, want safe stairs or a nightly caution test? Fix spacing and glare, or keep tiptoeing forever.
Summary
Step lights are safer on wet nights when they reveal edges with even low light, consistent spacing, and minimal glare. In Malaysia humidity, reflections and algae film can hide step lips fast.
If stairs still feel risky, lower and shield fixtures, spread light points more evenly, and clean lenses and treads so contrast returns. Avoid single bright sources that create hotspots and deep shadows.
Test your stairs on a wet night and adjust one glare source then move to a warm garden lighting guide or a slippery tile guide to keep the whole entry safer. Small placement fixes deliver the biggest safety gains.