You found a small gutter leak and you need a quick sealant repair that survives the next rainy week in Malaysia.
In hot sun and high humidity, sealant fails when surfaces are damp, dirty, or still moving, so a rushed patch peels off after the first downpour. Short-term repair.
In this guide, you’ll learn the 5 sealant steps that patch gutter leaks fast and last so you can prep the joint, seal it correctly, and avoid repeat dripping during storms.
Hi, I’m Ken. I write practical home guides for Malaysia—no fluff, just what works.
I hold a formal building design qualification and have spent about 20 years on job sites across hundreds of projects. My goal is simple: help you avoid costly mistakes with clear, safe steps—a quick way to decide what to do next.
1. Gutter sealant repair: 5 steps
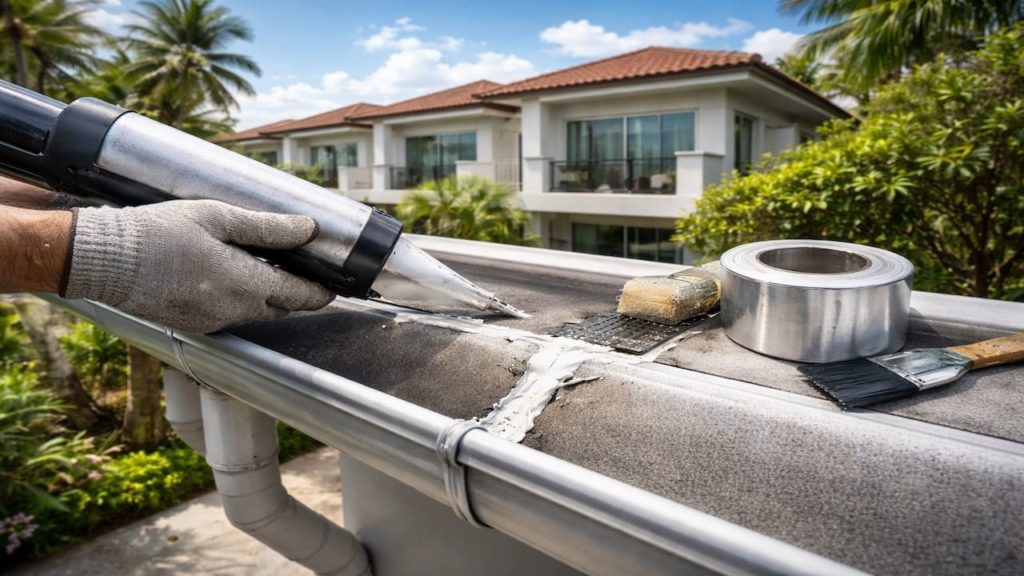
A lasting sealant patch requires clean dry surfaces and a stable joint or the leak will reopen under Malaysia heat and heavy rain.
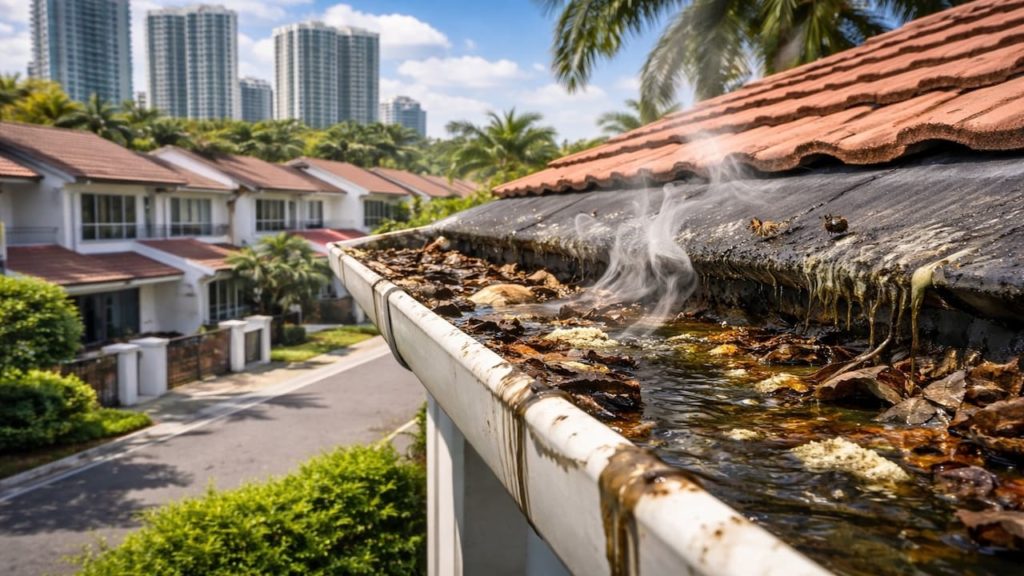
Most leaks are at seams, end caps, and corners, where movement is highest. Sealant is not magic, it is a gasket you build with good preparation—especially in humid weather. Prep first.
- Locate the exact leak point by drying the area and doing a small controlled pour test
- Remove loose dirt and old failing sealant until the seam edge is clean and firm
- Dry the joint fully and wait for a dry weather window so moisture does not trap
- Apply a continuous bead along the seam and press it to bridge the gap evenly
- Let it cure and retest gently before the next storm hits hard
You might think more sealant is better, but thick blobs crack and peel. A clean continuous bead with proper curing wins every time.
2. Patch leaks for the next rainy week
For a one-week survival patch you must stop water pressure and movement so the sealant is not asked to fight a backup or a sag.
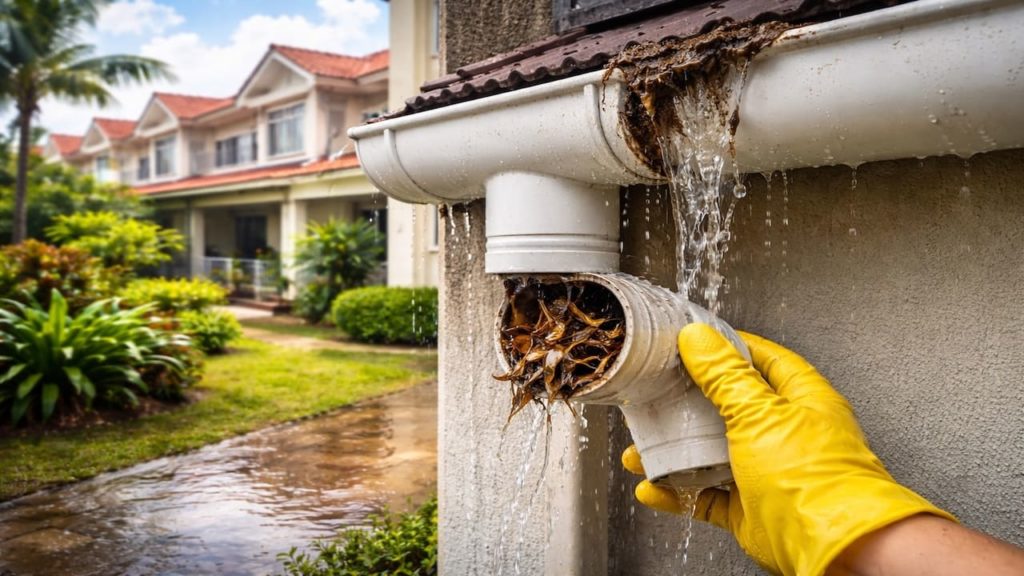
Malaysia rain bursts can overwhelm partially blocked gutters, and that pressure pushes water through seams even if sealed. Fix flow first and the patch lasts longer—simple logic. Pressure matters.
- Clear debris near the outlet so water level does not rise against the seam
- Tighten loose brackets near the leak so the joint does not flex under load
- Wipe the area with a dry cloth until it stops feeling slippery or gritty
- Apply sealant on both sides of the seam line if accessible for better bridging
- Shield the patch from immediate rain if possible until it skins over
Some people argue “I can seal even while it is damp.” You can, but it usually fails fast. If you want it to last the week, dryness is non-negotiable.
3. Why
Sealant repairs fail when they are applied over wet grime or old seal and Malaysia humidity prevents a strong bond.
Even if it looks dry, a thin damp film can remain in corners and under lips. Heat then expands the gutter and the weak bond tears, reopening the leak. Predictable failure.
- Old sealant left in place so new sealant bonds to a weak peeling layer
- Oil and roof dust film that prevents adhesion even on a dry day
- Joint movement from sagging brackets or loose screws near the seam
- Backpressure from a clogged downpipe elbow forcing water through the seam
- Wrong bead shape that leaves tiny channels for water to creep through
You might blame the sealant brand, but technique is the real separator. A decent sealant on a clean stable joint beats premium sealant on wet dirt.
4. How
Use a clean dry stable seal routine to make the patch survive storms and you will not be resealing the same seam next week.
Work in daylight and avoid ladders when surfaces are wet, because Malaysia humidity makes everything slick. Safety first. Keep the steps simple and verify with controlled water, not guesswork. Practical method.
- Dry the seam then mark the leak point so you do not lose it during cleaning
- Scrape away loose sealant and grit carefully without damaging the gutter edge
- Dry again and wait until the surface feels warm and dry to the touch
- Lay a smooth continuous bead and press it so it keys into the seam line
- Let it cure then do a controlled pour test and watch for 2 to 3 minutes
You might want to flood test with a hose right away, but that can wash out uncured sealant. Controlled testing is safer and gives clearer feedback.
5. FAQs
Quick answers for gutter sealant repair in Malaysia, so you can patch leaks safely and keep the next rainy week from turning into wall stains and damp smells.
Q1. Where do gutter leaks usually start?
Most leaks start at seams, corners, end caps, and around outlets where movement and water pressure are highest. Those spots also stay damp longer in humid weather.
Q2. Can I apply sealant during rainy season?
Yes, but you need a dry window and a fully dry surface to bond well. If you seal onto damp grime, it will peel quickly under the next burst of rain.
Q3. Should I remove old sealant first?
Yes, at least remove loose and peeling sealant so the new bead bonds to solid material. New sealant on weak old sealant fails fast in Malaysia heat cycles.
Q4. How long should I wait before testing?
Wait until the bead skins and sets enough to resist a gentle pour test. If you test too early with strong water, you can create channels and restart the leak.
Q5. When is sealant not enough?
If the joint is loose, the gutter is sagging, or the metal is rusted through, sealant will not hold long. Stabilize or replace parts instead of endless patching.
Pro’s Tough Talk
I’ve been on site for 20+ years and handled hundreds of jobs, and sealant repairs fail for the same reason every time. People seal wet dirt and pray, then Malaysia rain answers with a laugh.
Cause is 3 things: the seam was not clean, the joint was moving, or water pressure was high from a half-blocked outlet. Steps are 3 too: clear flow so water level stays low, lock the bracket so the seam stops flexing, then seal only when the surface is truly dry. Everybody has the “it looked dry enough” moment, and everybody has the “why is it leaking again” moment.
Here’s the rule, sealant is a bond not a bandage. Water is like a sneaky thief, it finds the smallest gap, and grime spreads like butter on hot toast. One jab: the guy who slaps sealant on in the rain is doing theater, not repair. Do the 5 steps right, or enjoy resealing forever.
Summary
A sealant patch can survive the next rainy week if the seam is clean, dry, and stable, and if water pressure is reduced by clearing outlets. Most failures come from sealing wet grime or moving joints.
Use a controlled pour test to locate the leak, clear nearby debris, tighten brackets, then apply a smooth continuous bead and let it cure before testing. Replace parts when rust or movement is severe.
Pick one leak point today and follow the 5 steps—a proper dry seal stops repeat dripping and you can move on to the next home fix calmly.